Showing posts with label #3200. Show all posts

Tuesday, November 26, 2019

Sally's Pants Muslin 3, Part 3

Here's the third set of changes to this muslin:


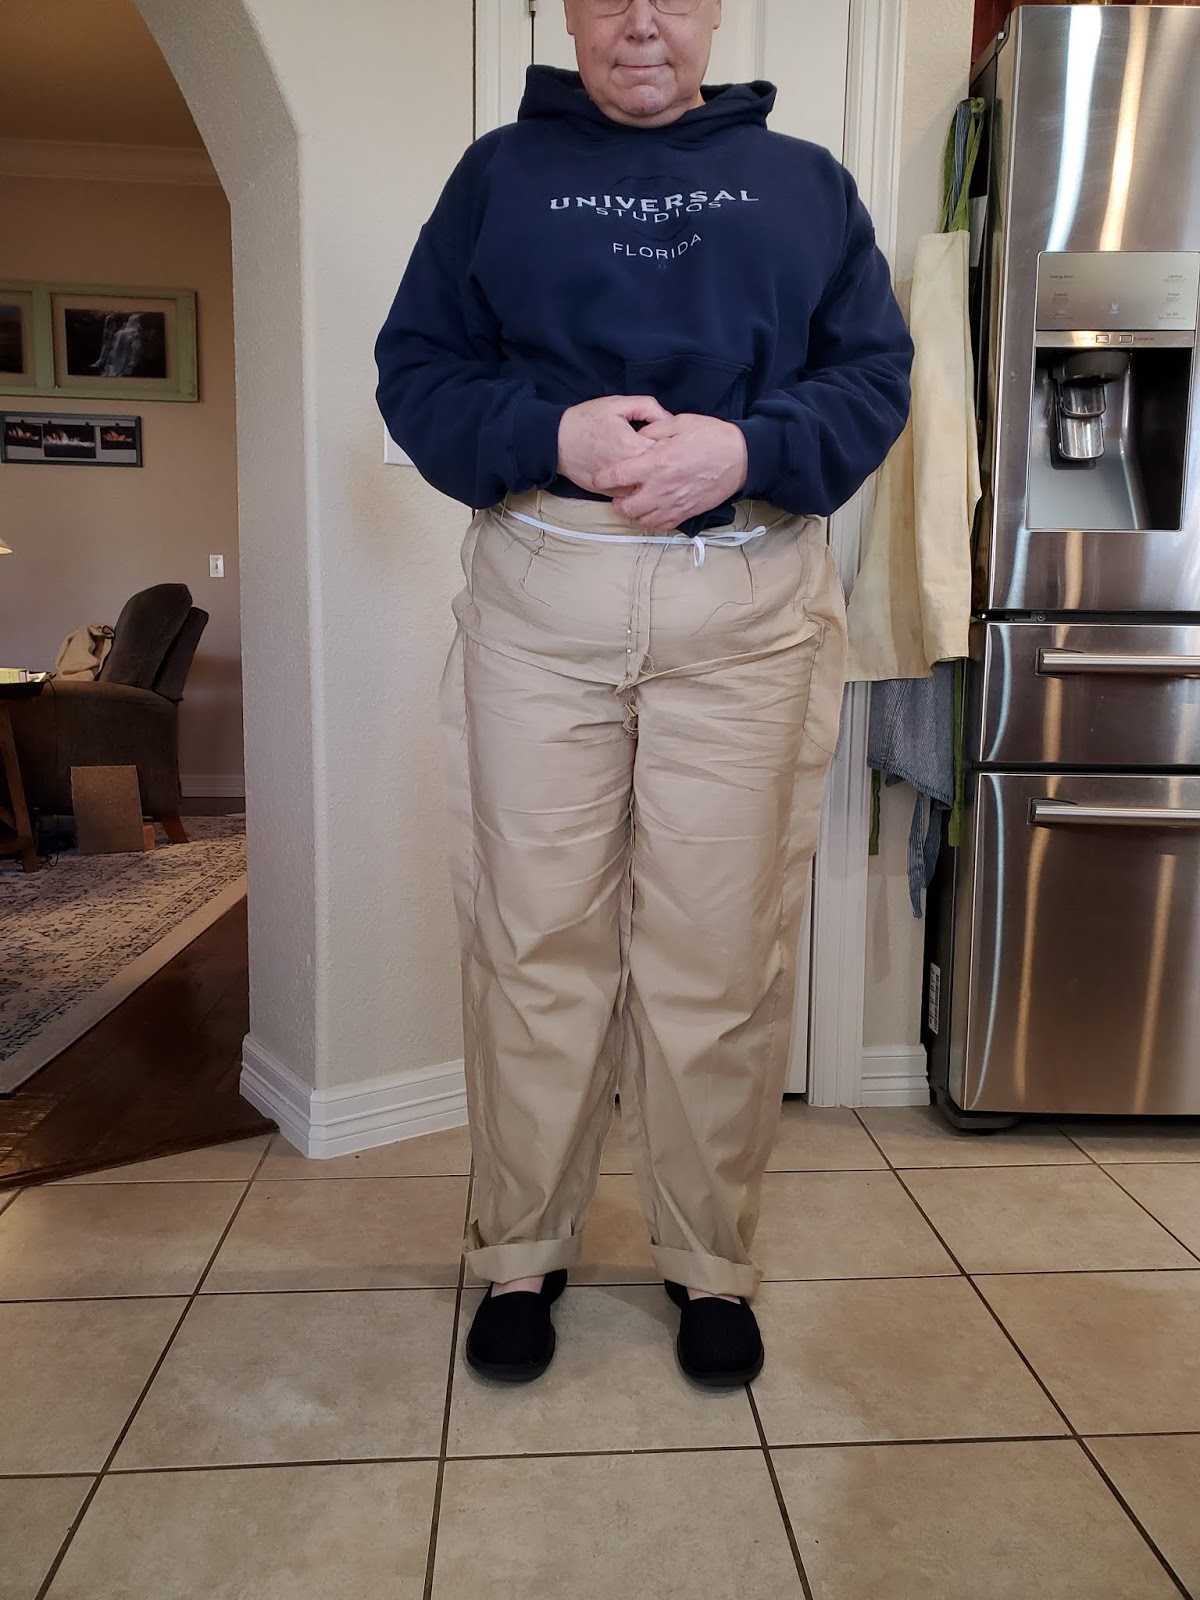
I released the crotch dart.  Even though there is a bit of funkiness still going on, my husband tells me that it is not always there.  I have elastic to mark the waistband.


I promise I really did press the muslin but these wrinkles are just from putting the pants on and moving around.  The changes here are the crotch dart has been removed, a little bit of width has been added, and the waistband marked. 

I think I'm ready to try this pattern in some fashion fabric.  I'm going to get the changes moved to the pattern.  The next few weeks will be extra busy but I will try to get a pair of pants made. 

If this is successful, I will move on to another type of pants either a knit pant or a pull-on woven pant or perhaps a slimmer legged pant.  Would you be interested in seeing the type of adjustments needed for the different type of pants? 

Happy Stitching!

Tuesday, November 19, 2019

Sally's Pants Muslin 3 Part 2

Here's part 2 of the third muslin:


I've stitched the lower front dart, shortened the front waist dart, added width to front, and added a dart at the crotch.  The front is looking fairly good.  I'm thinking that I will increase the width in the front again.


On the back, I have stitched the hip dart, pinned in a crotch dart, made the darts deeper, and removed width across the upper back.  This seems to be going backward a little bit. 

I can see more wrinkles compared to the last version of the muslin.  I think this is an indication that the pinned in dart isn't good.  I'm going to back off the pinned darts, make the mentioned changes to the front, give the muslin a little press, and see how the muslin looks.

Happy Stitching!
Tuesday, November 12, 2019

Pant Muslin #3 - Sally's Pant

This is my third muslin but the first muslin in this size.  I ditched the size 18 as I felt that it was just tight and I didn't really have enough seam allowance to let it out. The new size that I chose is a 22w.  Even though the size makes me feel huge, I realize that I'm not a skinny chick anymore.  So, here we go:


Here's the front straight from the pattern. It's not too bad.  You can see the tuck that will need to happen near the waistline.  I think I still need a little bit of room in the high hip/belly area.  I will be letting out the front seam a little bit.


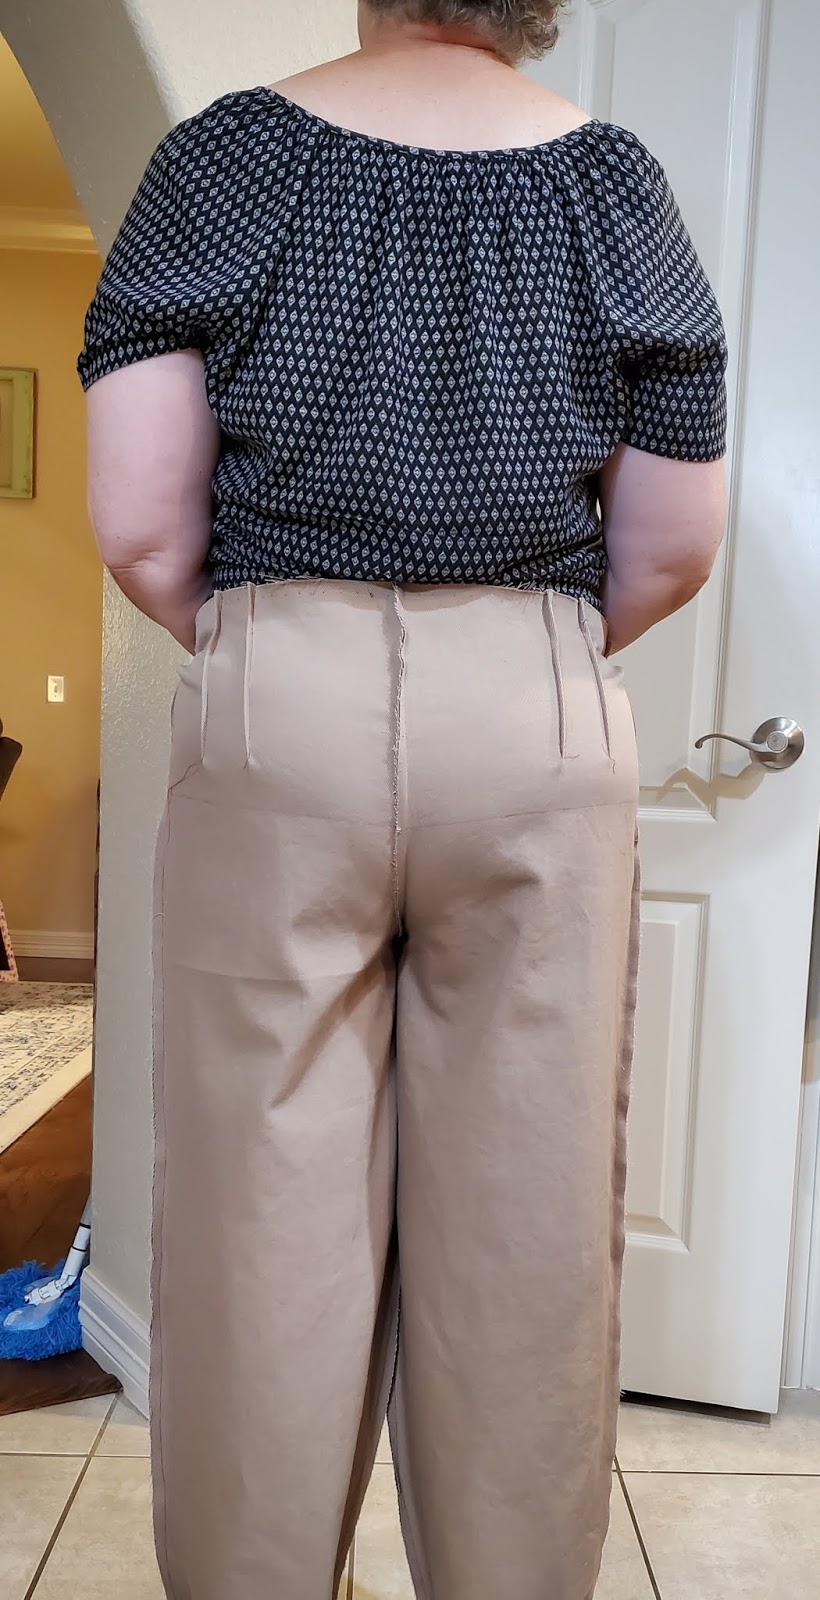
Here's the back straight from the pattern.  It's not too bad.  Certainly not any worse than a purchased pair of pants.  You can see the tuck from the front is wrapping to the back this will be a dart that goes all the way to the center back seam.  What can't really see in the picture is that there is two or three inches of extra fabric around the back waist.  I will make the darts a little wider/shorter and the back side seam a little bit bigger.


Here I have pinned out a hipline dart.  Doesn't that leg look much better?


Here I have pinned out a dart across the front.  It looks a little better.   After this picture was taken, the photographer said that it looks a little funny under that dart on the right.  I pinned a wee bit deeper seam and asked if that was better.  The answer was yes.

Unfortunately, this isn't stash fabric.  It also isn't a fabric that I would use to make a pair of pants.  I was unable to locate any non-stretch pant fabric.  Oh, I found suiting on-line that would have been suitable but $15/yard is a bit steep for a muslin.

I will be taking this round a bit slower.  I'm not going to be showing the stitched darts till the next post on the muslin.

Happy Stitching!

Wednesday, October 23, 2019

Pant Muslin #2 - Sally's Pants

I was hoping that muslin #2 would be a wearable muslin.  You can check out muslin #1 here.  I think that muslin #1 had more stretch than I was realized.  Muslin #2 is a bit tighter than I expected:


There are still funky wrinkles.  The pants are a little tight on the upper hip/waist in the front.  The back isn't bad but there are still wrinkles on the legs.  Here's a small change:


Here I have pinned an inseam dart front and back, and let the hip/waist area out totaling an inch.  I see improvement in the back.  So I am stitching the darts front and back.  Here's the result:


The pinned dart looks better than the stitched dart. 

Maybe I'm in the wrong size.  I definitely need more room in the front hip/waist area.  In looking at this I'm seeing more distinct wrinkles on the front.  I'm not sure how to handle them.  There are other darting options that remove length from the outseam.  I just don't know if that is needed or not. 

I think I'm going to re-evaluate the size I was using.  Maybe I need to try a different size or just start over using a more stable fabric. 

Happy Stitching!

Wednesday, October 9, 2019

Pant Muslin #1 - Sally's Pants

I have been taking the Pant Fitting Class at Silhouette Patterns.  The class is using the Silhouette Pattern #3200 as it's base.  Here's a look at the pattern:


The front cover of this pattern isn't interesting nor is the line drawing.  However upon opening the pattern, you realize that this is a very basic pattern - five pattern pieces total.  It is high waisted which is very current styling right now.

I dug around in the stash and found 1 1/2 yards of twill type fabric that is beyond prime use.  Here's a  closeup of one piece with markings in pencil:


Here's the first try-on:


This is a hot mess.  I definitely need more room from side-to-side in the high/hip and belly area.  It was very hard to pin close  I'm going to remove one of the darts to see if that helps a bit.  Unfortunately, I didn't have enough of this fabric to cut larger side seams and that would have been very helpful. 


The back doesn't look too bad.  There is a little bit of gaping at the waistline so I will take the darts up a little bit.  I need to figure out the wrinkle on the right side.

I think I need to go watch some videos on pant fitting.  Here's round 2 of fitting this muslin:


The changes here are the release of the darts.  This made it much easier to pin the pants closed.  I also put a little tuck across the front.  You can see in the first picture that the fabric was being pushed into this position.  The tuck does move around to the back but it is very small. I think I need to add a little dart in the curved area under the belly to remove those wrinkles.


The back isn't too bad.  Honestly, I would probably be happy with this but I'm going to try a small dart at the hip and see if it can be a little better.


Here I took a small dart in the crotch curve.  I think it may be a little bit low but the wrinkling in the front looks a bit better.


Here I took a small dart at the hip.  To my eyes, it looks like the dart should be a little deeper.


I'm playing around with fit just a little bit.  I released that front dart and pinned in a deeper crotch curve.  I think that I really need that dart.  I can't tell that the deeper crotch curve seam did anything.


Here I've taken a deeper dart at the hipline.  Those wrinkles are looking better don't you think?  I think I will pin a little bit deeper dart here and see what happens.


I think this is looking good for the front.  I'm ready to transfer these changes to the pattern.  I hope I'm able to do this accurately.


I think this back is looking pretty good also.  I'm ready to transfer the markings.  I will share one more set of pictures.  This will be with the pinned darts sewn.


This version isn't quite as good as the pinned version but I'm going to still transfer and see what I end up with.  The right side of this looks very good.  I will transfer from that point.


This version isn't bad. I will be truing the high hip dart and transferring the information from the right side.  In this picture, I also have the hem pinned in.  That way I can get the pattern trued for the hem.

I'm ready to start muslin #2.  I may not put the seams on the outside with that one.  I'm guess I'm feeling pretty confident with this muslin.  Folks, I can't emphasize how much easier it is to fit a muslin with the seams to the outside.  I have done this with the last two muslins that I did and I only had to cut one muslin before I went one to create a garment.  Try it and let me know how it works for you.

Happy Stitching!