
The front cover of this pattern isn't interesting nor is the line drawing. However upon opening the pattern, you realize that this is a very basic pattern - five pattern pieces total. It is high waisted which is very current styling right now.
I dug around in the stash and found 1 1/2 yards of twill type fabric that is beyond prime use. Here's a closeup of one piece with markings in pencil:

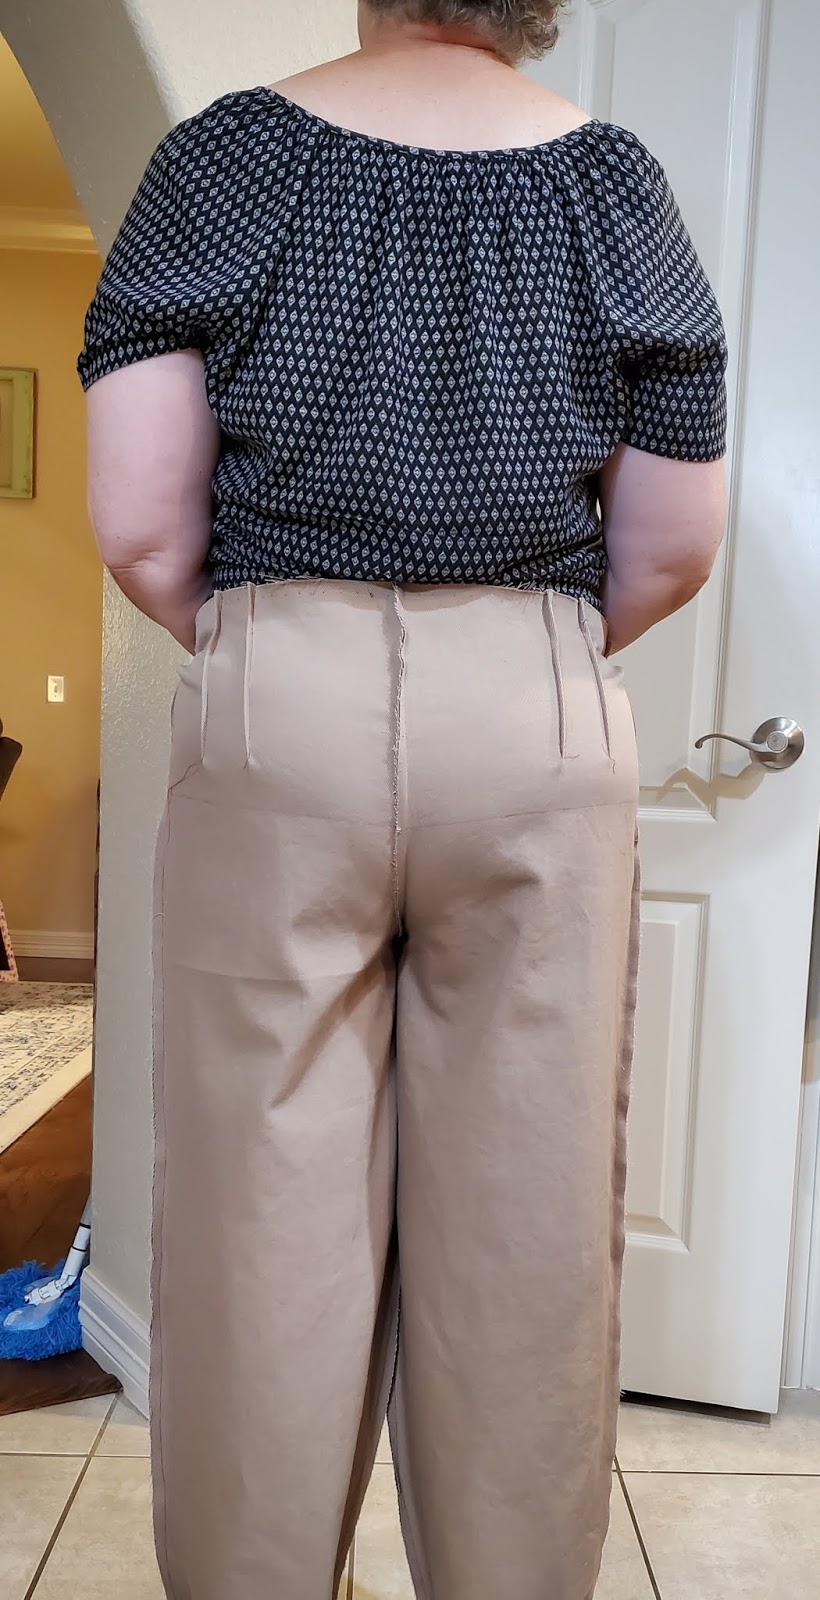
Here's the first try-on:

This is a hot mess. I definitely need more room from side-to-side in the high/hip and belly area. It was very hard to pin close I'm going to remove one of the darts to see if that helps a bit. Unfortunately, I didn't have enough of this fabric to cut larger side seams and that would have been very helpful.

The back doesn't look too bad. There is a little bit of gaping at the waistline so I will take the darts up a little bit. I need to figure out the wrinkle on the right side.
I think I need to go watch some videos on pant fitting. Here's round 2 of fitting this muslin:

The changes here are the release of the darts. This made it much easier to pin the pants closed. I also put a little tuck across the front. You can see in the first picture that the fabric was being pushed into this position. The tuck does move around to the back but it is very small. I think I need to add a little dart in the curved area under the belly to remove those wrinkles.
The back isn't too bad. Honestly, I would probably be happy with this but I'm going to try a small dart at the hip and see if it can be a little better.

Here I took a small dart in the crotch curve. I think it may be a little bit low but the wrinkling in the front looks a bit better.

Here I took a small dart at the hip. To my eyes, it looks like the dart should be a little deeper.

I'm playing around with fit just a little bit. I released that front dart and pinned in a deeper crotch curve. I think that I really need that dart. I can't tell that the deeper crotch curve seam did anything.

Here I've taken a deeper dart at the hipline. Those wrinkles are looking better don't you think? I think I will pin a little bit deeper dart here and see what happens.

I think this is looking good for the front. I'm ready to transfer these changes to the pattern. I hope I'm able to do this accurately.

I think this back is looking pretty good also. I'm ready to transfer the markings. I will share one more set of pictures. This will be with the pinned darts sewn.

This version isn't quite as good as the pinned version but I'm going to still transfer and see what I end up with. The right side of this looks very good. I will transfer from that point.

This version isn't bad. I will be truing the high hip dart and transferring the information from the right side. In this picture, I also have the hem pinned in. That way I can get the pattern trued for the hem.
I'm ready to start muslin #2. I may not put the seams on the outside with that one. I'm guess I'm feeling pretty confident with this muslin. Folks, I can't emphasize how much easier it is to fit a muslin with the seams to the outside. I have done this with the last two muslins that I did and I only had to cut one muslin before I went one to create a garment. Try it and let me know how it works for you.
Happy Stitching!
No comments:
Post a Comment