Monday, November 30, 2015

Holiday Table Runner....

I have been working on a table runner.  I hinted at the project here with a picture of the fabrics.  This is a tumbler project and it's the first that I can remember doing a tumbler pattern.  Here's a picture of the pattern:


This is Tumbler Table Runner by Cottage Creek Quilts.  Here's my version of the pieced top:


I used the Fat Cats Triangle Ruler to cut the tumbler per the directions.  It certainly was very easy using the ruler.  Here's what the ruler looks like:


I did make a pattern template (included in the pattern) with card stock but decided that it would be easier to use the ruler.  Cutting the tumbler with the ruler was quick and easy.  This was my first time using a specialty ruler.  I hope that I can find other uses for it.  Here's the finished table runner:


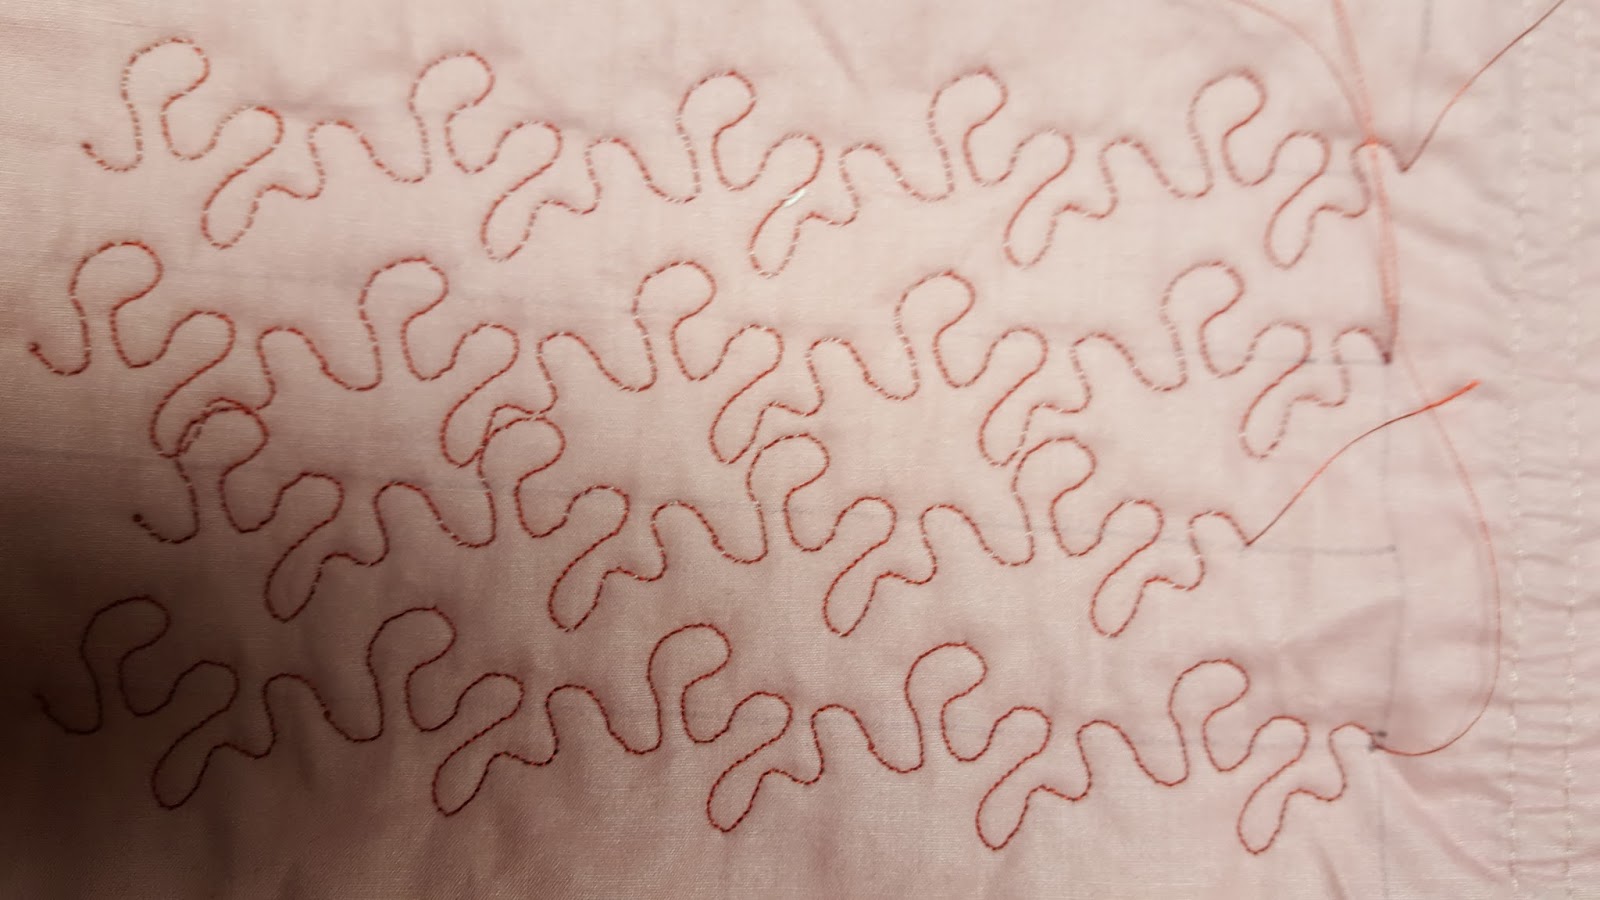
For the quilting, I used a quilting design from my machine that looked like a large stippling design and a 40wt embroidery thread for the quilting.  I stitched several samples but the actual quilting on the table runner looked much tighter than the samples.  Here's a glance at a sample:


Here's a close up of the quilting on the table runner:


I used the technique for the mitered corners from the Double Fold Binding Technique on youtube by Nancy Zieman.  Joining of the binding is from an older quilting book. I finish attaching the binding by hand.

Yes, I'm doing a happy dance that I actually finished it before the holidays.

Happy Stitching!


Wednesday, November 25, 2015

Ready For The Mystery To Begin....

I was beginning to doubt my ability to get every thing ready before the Allietare Mystery Quilt started on Friday.  Somehow, all the fabric has been purchased, washed, and pressed.  Here's the proof:


I even was able to locate the necessary rulers which are on back order in many locations:


Now, I'm just hoping that I can keep up with the weekly events.  I will be out of town during some of this but hopefully I will be able to download the information and play catch-up when I return.

What do you think of my color selections?

Have you ever participated in a mystery quilt before?  More importantly, did you finish the mystery quilt?  I would love to hear about your experiences.

Happy Stitching!

Tuesday, November 24, 2015

Seam or Edge Finishes....

My sewing buddy and I have been been having issues with our sergers.  So, this month we decided to revisit seam finishes.  Let me tell you that I do feel extremely spoiled having had a serger for the last 25 years (wow! does that seem like a long time).  I haven't had the need for the majority of seam finishes that I used in my younger sewing days.  Here's the finishes that we practiced with:

1.  Flat Fell - We kinda followed the basic directions for the Flat Fell Foot in the Husqvarna Accessories Book.  The Husqvarna flat fell foot is 9mm foot and really intended for home dec.  My sewing buddy had a generic 6mm flat fell foot.  The 9mm foot stitched a beautiful seam without any additional manipulating of the machine.  The generic 6mm foot stitched a beautiful seam but there was a fair amount of manipulating the machine due to the fact that the foot didn't line up with the needle.  There are many tutorials available on the internet to create the flat fell seam with and without a foot.

2.  French Seam - This is perhaps my favorite seam finish.  All the raw edges are enclosed and it looks beautiful.  Typically, this is used in heirloom sewing today. Children's clothing can benefit from this particular treatment. For a 5/8" seam, I would typically put wrong sides together stitch 1/4" seam, press seam open, then press flat with the right sides together, stitch a 3/8", and call it done,  But this can be manipulated a little more.  If you wanted a flat fell seam look, make sure that the finally seam stitching will be on the outside and then, you can top stitch this into place.  Very easy.  Please realize that the 5/8" seam is an example.  The seam can be produced with smaller seams.

3.  Bound or Hong Kong Finish - This is where things got a little funny.  We both thought that we had binding feet to play with.  I did finally find the 1/2" Husqvarna binding foot but I really thought that I had one in each available size. Using the foot wasn't very successful but using a clover bias binding maker and manually binding the seam edge was okay.  I really think that the having the binding foot would have created a better edge.  I did finally realize that all of my binding feet were attachments for my antique machines.

4.   Edging Foot J - This foot is all about using overcasting stitches.  On my machine, the right zigzag works very well with this.  This is the stitch that I used to finish the remainder of the fabric edges this past weekend.

When we were done playing with these items, we turned our attention to the narrow hemmers.  Are you successful with these feet?  Amazingly, I couldn't find a hemmer that would work on my machine.  My sewing buddy had one hemmer and had been unable to get it to work.  So, I showed her how I used a hemmer.  I always press the whole edge and then press the first couple of inches a second so I can get it started in the machine.  Then, under the foot it goes and I anchor it with the needle and slide the edge into the machine.  I also hold the the item being hemmed up just so the pressed edge is on the inside edge of the foot and the edge that needs to be turned under is hitting the inside of the hemmer.  It stitched perfectly.  My friend was able to repeat the process.

The final item that we played with was the Husqvarna instructions for The Hand-look Quilt Stitch.  Here's my sample:


Typically with this type of stitching you would use a clear or smoke thread so that the bobbin thread would pop but my sewing buddy was using my spool of nylon and the thread holder, so I just used the thread that was on my machine and changed the bobbin to a dark thread.  You do need a programmable machine to use these techniques.  The first row on the left is the #3 stitch on the instructions. We were both amazed by this stitch.  I'm not sure about it looking like hand quilting but it peeked my interest because it reminds me very much of the stitching on a hand picked zipper.  The second row from the left is the #1 stitch in the instructions.  I really liked the way this looks and it is amazing when using the clear nylon thread.  The third row from the left is the #2 stitch on the instructions.  The final row is a pre-programmed stitch on my machine.  I just selected it and stitched.  It looks okay.  Definitely not my favorite.

Overall, we had a very successful stitching day. Practicing techniques and learning new techniques.

Do you have any seam finishes that you like use outside of the serger?  I would love to hear about them.

Happy Stitching!

Monday, November 23, 2015

Serger: Two Thread Narrow Overlock...

Have you tried the 2-thread narrow overlock stitch?  This weekend I had a lot of 1/4 yard cuts of fabric that needed to be washed.  The stitch that I would normal use is a 3 or 4-thread overlock or whatever stitch was currently set up but I decided to branch out and try something new.  So, I looked up the information on the 2-thread narrow overlock.  Here's what it looks like:


This sample has already been washed and the 2-thread narrow overlock did the job of stopping the fraying very well.  I'm so happy that I decided to step outside my comfort zone and try something "new" to me with my serger.  It's really a shame that I don't try more of the stitches on my machine.

Unfortunately, the experience of stitching so much fabric brought my machine to it's knees.  I only got the edges of about half the fabric stitched when I started having issues with what seemed like the motor seizing.  I played with it a little and then decided that maybe I should just take it in for service.   My machine is is 12 or 13 years old.  I'm truly hoping that it's not the motor.  They always tell you it is dirty when you take it in for service.  Yep, this is going to be very dirty.  I did try cleaning it and giving it a little oil but that did little to help with whatever the problem is.  SIGH!   I guess Tuesday I will make the hour or so drive to take it in for service.  Now, where is that GPS?

Oh, my sewing machine happily finished stitching the edges of the remaining fabric. It just took another 2-3 hours to finish it up.

Happy Stitching!

Wednesday, November 11, 2015

Love This Skirt....

I absolutely love this skirt:


This is the Side Wrap Pleat Skirt.  It is nice and long.  It is a perfect boot skirt.  The issue is that there is one skirt left in stock as I write this and it is a little size 6.  I'm looking for a pattern that can be adapted to look similar or even ideas on how to add this pleated wrap to a skirt.

Let me know your ideas or a pattern.  There are just too many pattern companies to keep up with all of them.

Happy Stitching!