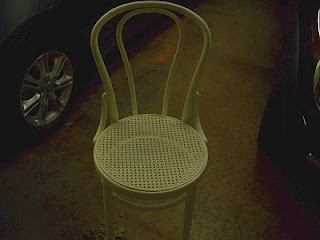
I decided to take an chair from the house to my office/shop but it needed to be changed a little bit. This chair had been sitting on my deck for the last couple years. So the finish on it wasn't in good condition. Here's a pic after it was sanded:

 DH stepped in and painted the chair for me. Although the chair looks very white, it's not. It is an ivory color.
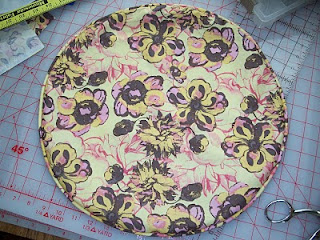
 I made a pattern by measuring across the seat, dividing by 2 and adding 3/4". Then drew a big circle. This took 1/2 yard of 44" quilting cotton.
 Here's the leftovers after cutting out the cushion cover. At this point, I'm hoping that square is big enough to create the ties and bias binding for the piping.
 All squared up.
 Selecting the spot to cut the 45 degree angle for the bias strips.
 Moved the piece from the right to the left so that the straight edges can be sewn together. Notice that both outside edges are now at a 45 degree angle.
 Stitched the 1/4" seam.
 Pressed seam to the side.
 Not shown is how I figured the width of the bias binding which is going to be 1 3/4" wide. How I calculate is by taking the piping and a tape measure. Wrap the tape measure around the piping making sure that you seam allowance (1/2") is visible under the piping. Turn the tape measure over and see where the end of the tape measure end is sitting. That is the width of the bias binding.
  Here I took a colored pencil and drew my lines.
 Here is where I pinned the seam together. This is where you have to be accurate. Make sure the lines meet on the seam line (1/4").
 Here's the seam sewn and you can see that my lines match from one side of the seam to the other.
  The cut out bias strips.
 Piping sewn to top. Here's I'm getting ready to attach the two ends to make the continuous loop of piping.
 Piping is finished, zipper installed, and everything is sewn together. Not to bad for a quick cushion cover. Can you see what I forgot? It's in the picture below.
  Cushion cover has the pillow form in it. Yes, it's a pillow form and not a cushion. I went to JoAnn's to get a round cushion but they only had a pillow form which makes it a little puffier than what I wanted. Cushion needs to be played with a little bit to get it to fill out the cover a little better.
Following are examples of how it looks:

 This is far from perfect but I'm happy with it. It is the very first time that I have made a round pillow cover. The very first time that I have put a zipper in the round. The zipper didn't turn out so great but it is definitely a learning experience. I love the fabric and actually think that it would have made a great skirt or even a shirt.
The pillow form was suppose to be the same size as the chair - 16". It's not really true. Maybe if you measured from seam to seam on the pillow but it definitely doesn't sit as 16". When making a cover for a pillow or a cushion, make it the same size as what is being covered as in don't add seam allowances unless you need a little for the height of the cushion/pillow form. That way it will fill out the cover.
Oh, I forgot to tell you that I had just enough bias strips for the piping and the ties. The ties are a tad short but will tie.
Happy Stitching!
No comments:
Post a Comment