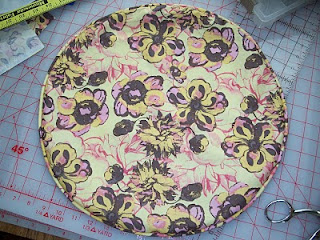
The photo to the left is fabric that was left after I had cut out the front and back for the red pillow. I was doubting that there was enough fabric left to make the bias binding for the piping but I decided to give it a try. If it worked great. If not, it would go in the trash.

Here is the fabric that was left after I cut out the many squares and rectangles to make the bias. Yes, I'm a little bit worried at this point. I didn't have any large pieces of fabric so I had to individually cut each strip and sew it together. The seam ripper was my friend today.

Here I'm getting ready to apply the piping to the pillow front. Please note that I did not enclose the cording completely. I left approximately 3 inches open and started the stitching in the middle of one side.

Here's where I marked corners. This is important for turning the corner with the piping. The piping will need to be clipped to turn the corner.

At this point, I have almost finished applying the piping to the front panel. I stop stitching about 3 or 4 inches from the end of the piping. This will leave a gap of 5 or 6 inches. Pin the cording out of the way so that only the bias out.
I had a piece of the bias that was about 3 inches long that I fold in half the long way and pressed. Mark the middle of this strip with a needle.

In this picture, you can see that the piping has been pinned out of the way. I have taken the short strip and pinned it approximately half way in between the seams. Now, take another pin and mark the pillow front. Now, trim the right bias piece to the left edge of the short trim piece.

Repeat the process with the left bias piece and trim to the right of the short trim piece.

Now, pin the bias trim at 90 degree angles (make sure that the right sides are together). Draw a line from corner to corner. This will be your stitching line. After stitching, trim to 1/4" seam allowance.

Now, the bias for the piping is a continuous piece. The next thing is to trim the cording for the piping so that the two ends meet. Complete the stitching. Now, you have piping that doesn't have a visible starting / ending point.

Here's the back of the completed pillow cover. You can just barely see the zipper along the bottom edge.

Here's the pillow cover with the pillow form inserted. It's a little bit dog eared. I don't know if that is because of how I stuffed the pillow form in or just the nature of a square pillow. I know that there are templates available that help to prevent the dog eared points. I have also heard that if you do not add the seam allowances to the pillow cover that it will be nice and firm. I would guess that the corners would be filled out fairly well also. If anyone has tried the technique of not adding the seam allowances, I would love to hear how it turned out.
The information for the continuous bias is from Robbie Fanning's book "The Complete Book of Machine Quilting". She credits the technique to Ann Person of Stretch & Sew.
Happy Sewing!

 Step 2. Press the edges back. The picture above, the narrow piece has 1/2" fold and the larger piece has a 1" fold.
 Step 4. Close the zipper and take the narrow piece of the pillow back. Carefully push the fabric to the zipper where you have applied the Wonder Tape. You want this to be as straight as possible. Check again that the zipper will open without bumping into the fabric. (If you have chosen not to use the Wonder tape, carefully baste your fabric to your zipper making sure it is straight.)
 Step 5. Open the zipper and use the zipper foot as your guide by placing it along the edge of the fabric next to the zipper. Stitch. (Sorry, I forgot to take a picture of the positioning)
 Step 6. Close your zipper. I always have a 1/4" overlap for the zipper. At this point, I apply more Wonder Tape to the zipper edge that was just sewn. (Again, you can baste if you don't want to use the Wonder Tape. Be carefully with your positioning).
 Step 7. Apply the larger piece of the pillow back along where the Wonder Tape has been applied.
 Step 8. Turn over the pillow back as your next row of stitching will be from the back. Position the fabric using the zipper foot as your guide along the edge of the zipper tape. Stitch. (If you basted the two pieces together using the zipper tape as a guide, stitch from the front stitching along basting.)


